
How to run ChatGPT on your own computer
A quick start guide with Open WebUI and Ollama
David Linhares
May 29, 2025 ・ 10 min read
Have you ever thought of running your own instance of ChatGPT (kind of)? Well, in a few steps you can do it, let’s have a look.
- Glossary
- Open WebUI
- Ollama
- The Simple Way
- The “I can do things on my own” Way
- Accessing the Open WebUI Chat Interface
- Final Considerations
Before we get into the action, let’s learn a bit about the tools we are going to be using in this guide.
All of the steps taken in this guide are executed on Ubuntu Linux but there is documentation on running them on windows as well.
This tutorial also presumes you are familiar and able to run locally Docker.
Glossary
- LLM: Large Language Model
- OS: Operating System
Open WebUI
Open WebUI, as described on their github README, is “an extensible, feature-rich, and user-friendly self-hosted AI platform designed to operate entirely offline.”
It supports various LLM runners and in today’s guide we are going to use Ollama.
Ollama
Ollama, putting simply, is a LLM runner. Similar to Docker but instead of containers (small images snapshots of an OS state) it runs Large Language Models.
The Simple Way
To quickly have both applications running locally we are going to be using Docker to run containers, provided by both projects, with all of the required setup for those apps already in place.
Docker Compose
Docker compose is a tool for defining multi-container applications. This tool allows for running several containers from a single configuration file. To learn more about docker compose visit Docker Compose official documentation. Since we need two tools (Ollama and Open WebUI) running locally, using docker compose allows us to not only document the containers we need in a configuration file but also optimize and simplify our workflow.
First of all create a new folder to store the docker compose file:
mkdir ollama-openwebui && cd ollama-openwebuiThen create on the aforementioned folder a docker compose file with the following content:
# content of docker-compose.yml
version: '3'

services:
  ollama:
    image: ollama/ollama:latest
    container_name: ollama
    ports:
      - "11434:11434"
    volumes:
      - ollama_data:/root/.ollama
    tty: true
    restart: unless-stopped

  open-webui:
    image: ghcr.io/open-webui/open-webui:main
    container_name: open-webui
    volumes:
      - open-webui_data:/app/backend/data
    ports:
      - "3000:8080"
    environment:
      - "OLLAMA_API_BASE_URL=http://ollama:11434"
      - "WEBUI_SECRET_KEY="
    extra_hosts:
      - host.docker.internal:host-gateway
    depends_on:
      - ollama
    restart: unless-stopped

volumes:
  ollama_data: {}
  open-webui_data: {}
With the docker compose file created, run the following command to stand up both containers:
docker compose up -dAfter pulling images (which can take a few minutes), you should see confirmations of:
- A network created to connect both containers
- Ollama container started
- Open WebUI container started
In the next section we are going to showcase how to install each tool manually, you can then navigate to the Accessing the Open WebUI Chat Interface section for instructions on using the tool.
The “I can do things on my own” Way
Setting up Ollama Using the CLI
Ollama is available to download here based on your computer’s OS. For quickly installing on Linux simply run the following command:
curl -fsSL https://ollama.com/install.sh | shOnce the above script executes successfully you can confirm Ollama has been installed by running ollama --version and checking whether the currently installed version matches the most recent available at their github releases page.
A personal recommendation, for any CLI I install, I like running its help for getting familiar to its available options, so give ollama --help a try.
Running Ollama With Docker
In case you prefer to run Ollama from a container instead of through the CLI above (which installs a service), the oficial ollama image is available on docker hub. To run it, use the following command:
docker run -d -v ollama:/root/.ollama -p 11434:11434 --name ollama ollama/ollamaSetting Up the LLM
This step is totally optional since we can manage the models available locally in Ollama through the Open WebUI interface, as we will see later in the guide. Recommended in case you’d like to know more about using Ollama.
With the Ollama runner installed, let’s get the desired model installed for locally running it. In this guide we are going to use Google’s Gemma 3, which was recently released and since Google’s I/O conference has been making headlines left and right. For that, simply run ollama run gemma3 (or ollama run gemma3:latest) on your terminal to download their 4b model variant (~3.3GB of Disk space is required). ollama run installs a model if it is not installed and automatically runs it afterwards. This operation may take a few minutes, depending on your internet connection, since it is downloading the model to your machine.
In case you are interested in using other models feel free to navigate to Ollama’s models page and choose any of their available models. Remember some models have more advanced capabilities than others, so depending on your use case make sure you are also looking at the models benchmarks and context performances.
Here are a few resources for LLM benchmarks:
Once this operation is completed you will be greeted with a prompt to insert a query, to test the model feel free to ask any question, such as “what day is it today?” - that way you know what is the day the model think it is today, a fun prompt engineering conversation starter trick.
To close the chat experience in the terminal input /bye in the prompt and hit enter.
Setting up Open WebUI
Now we are going to set up the UI for interacting with the model we just installed using ollama. There are a few options for running the project, one of them being even cloning their github repository.
Cloning the project
On your terminal:
# clone the repository code
git clone https://github.com/open-webui/open-webui.git

# switch to the newly created folder
cd open-webui

# setup env variables for running the app
cp -RPp .env.example .env

# ensure you are running a node version
# accepted by the project's engine
# see https://github.com/open-webui/open-webui/blob/main/package.json

# install dependencies
npm install

# once install is completed, run the app
npm run dev
The app should be now running on http://localhost:5173.
Running Open WebUI Docker Container
You can run the following command to run the Open WebUI docker container:
docker run -d -p 3000:8080 --add-host=host.docker.internal:host-gateway -v open-webui:/app/backend/data --name open-webui --restart always ghcr.io/open-webui/open-webui:mainIn case you have a NVIDIA GPU (aka minecraft powerhouse), run:
docker run -d -p 3000:8080 --gpus all --add-host=host.docker.internal:host-gateway -v open-webui:/app/backend/data --name open-webui --restart always ghcr.io/open-webui/open-webui:cudaMore information or troubleshooting, see Open WebUI - Quick Start.
Accessing the Open WebUI Chat Interface
After successfully going through setup, you should be able to access the application from http://localhost:3000 or http://localhost:5173, depending on the setup route you took on this guide.
Click on the “Get Started” button at the bottom of the page, enter name, email and password for creating an admin account (remember those credentials, these will be important when signing in again) and voilà, you should be greeted with the welcome chat page.
In this page you won’t have much going on, only a text input with a few other options in the middle of the screen and a few menus in both top corners.
The first thing you want to do is, using the “Select a model” menu from the top left corner, choose the model in which the chat is going to use got solving your prompts. Since we are working after fresh setup of Ollama we don’t have any models installed. In the search a model input type gemma3:latest and select “Pull gemma3:latest from Ollama.com”.
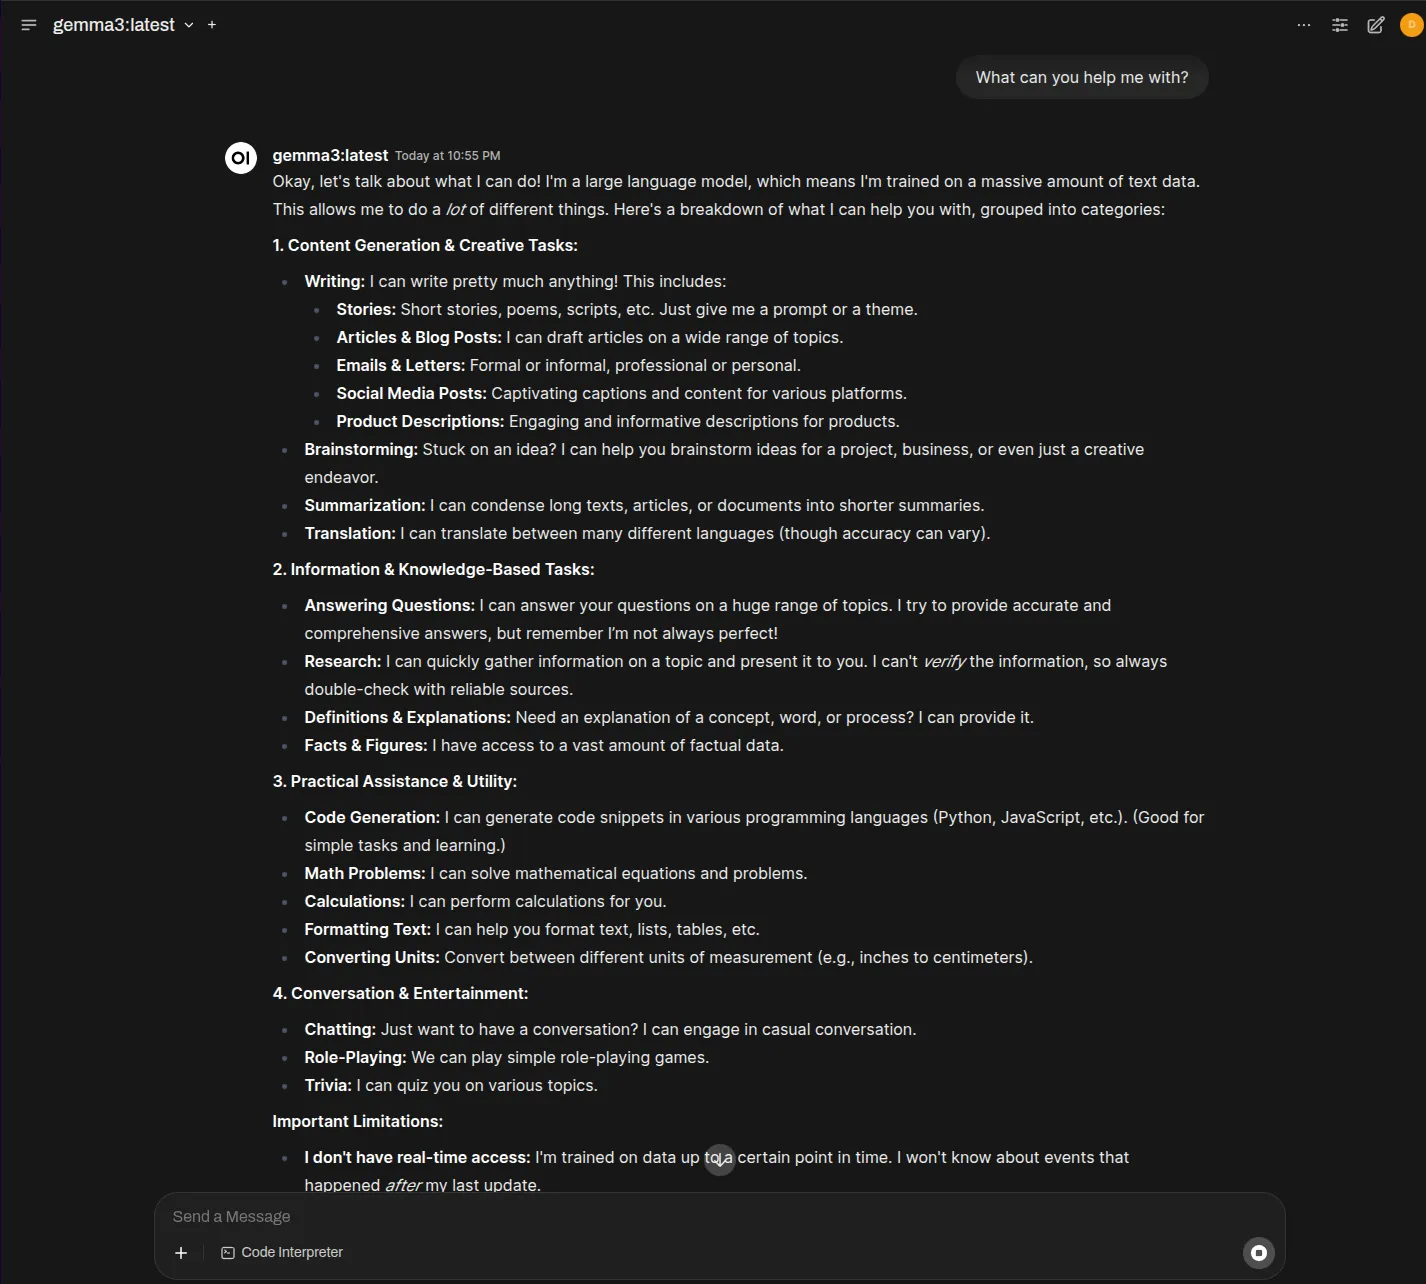
Once the model is downloaded you can start prompting. Try something like “what can you help me with” to get an insight into the capabilities of the model and then move to more complex prompts.
Final Considerations
With the help of Ollama and Open WebUI we can run models on our own local machines and have a delightful experience while using a well rounded chat application that can leverage locally run LLMs. There are other tools available to run local LLMs, such as LM Studio and PrivateGPT.
Running your own ChatGPT (or kind of) has never been this easy and accessible.
See ya! 👋